


A practical guide to get started with confidence.
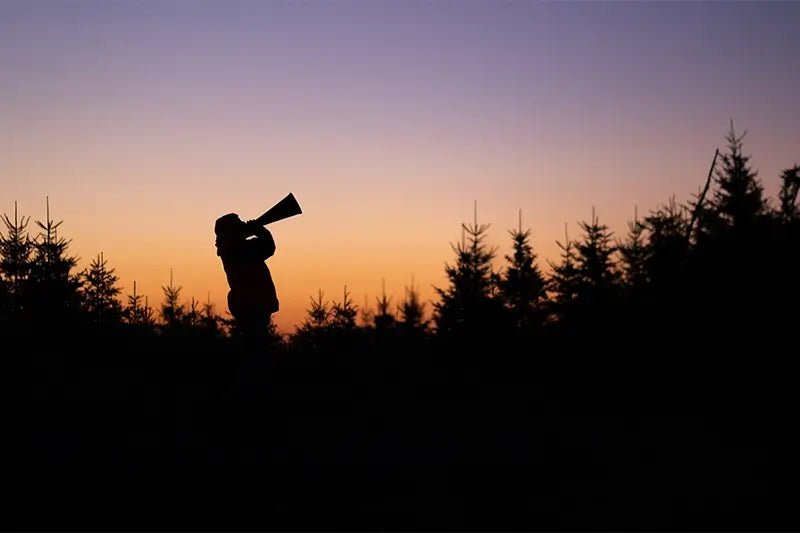
As you probably already figured out, hunting, like a lot of other sports, is a lifestyle. And we’re here to tell you it doesn’t have to be an intimidating one. This article breaks it down into three steps, from the most abstract to the most down-to-earth.

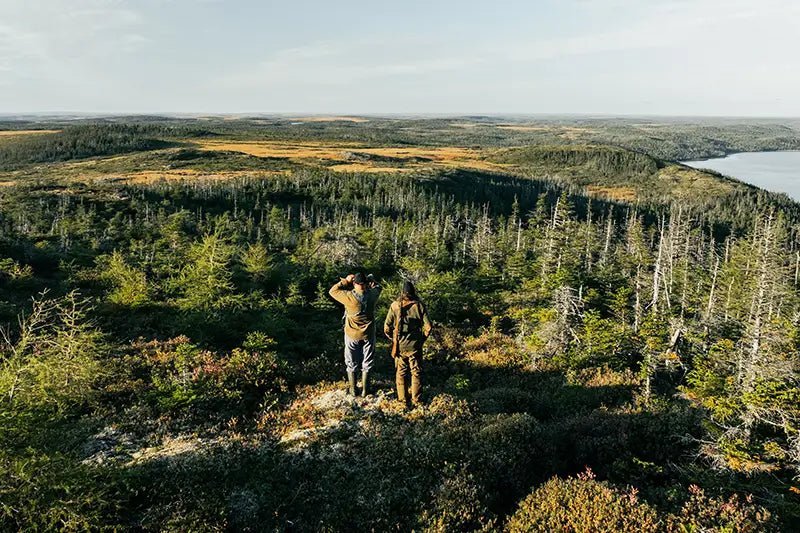
STEP 1: Find your community
Let’s start with the most complicated topic: the culture.
Hunting starts with the hunt for knowledge. Wherever you begin, you’ll soon find the information landscape is vast, and there’s an ocean of schools of thought filled with strong opinions that are hard to navigate.
Cut through the noise with a simple truth: science is your friend, experience is your best friend, and overthinking is your enemy. Remember that true ethical hunting plays a crucial role within your region’s conservation effort. And in the end, the key is to stick with what feels right and what works for you. You’ll know when you’ve found it.
The internet is a crucial resource (videos, podcasts, forums, mapping tools) but it’s only half the picture. Walk into your local hunting stores like SAIL, Latulippe, Pro Nature, and talk to the counter staff. They can translate theory into local reality: where access is legal, how animals move in your area, what simple gear actually works, and how to pair a mapping app like Avenza with your province’s public-land layers (for Québec, think foretouverte.gouv.qc.ca) for practical scouting. Five minutes at the counter can save weeks of trial and error and connect you to mentors, clubs, and range officers. But most importantly, you will start to get a feel for what the culture is truly like and it will quickly replace nerves with momentum when you see how open, welcoming and knowledgeable the community really is.
Most importantly, you will soon realize how hunting is all about a true connection with nature and a deeper sense of respect for the animals you harvest.
When you get home, here are some other relevant and qualified sources to answer all your questions:
STEP 2: Big game or small game? Pick one and go all in.
When you are new, focus is your best friend. Pick one lane, learn it deeply, then expand. A classic starting lane is grouse. It’s close to home, low cost, and perfect for learning how to move slowly, read cover, and make clean, safe shots. If you’re unsure where to begin, start there. You’ll build real skill without heavy logistics.
If you already feel a pull toward another species or a certain style, follow that calling. Passion keeps you in the field when the weather turns or the days get slow. The point is not to chase everything. The point is to learn how to hunt well.
Quick guide to popular hunts in Canada
Use this to match your interest with a style of hunting. Always confirm seasons, zones, legal methods, and access rules where you live.

Small game and birds
-
Ruffed grouse and spruce grouse
Style: Walk and pause in mixed forest, work edges and young growth, shots are quick at short range.
What it teaches: Pace, patience, safe shot windows, reading cover.
Cost and logistics: Low. Day trips, simple kit, no guide required. -
Snowshoe hare
Style: Still-hunt and track after a light snow, focus on conifer edges and trails.
Teaches: Tracking basics, backstop awareness with a .22 where legal.
Cost and logistics: Low. Good winter practice. -
Ducks and geese
Style: Set decoys, call, hide well, time your shots, use non-toxic shot.
Teaches: Hide building, calling, shot selection, safe bird identification.
Cost and logistics: Moderate. Waders and decoys help. Early mornings and weather matter. -
Turkey
Style: Ground blinds or run and gun, call birds, pattern your shotgun.
Teaches: Calling, patience, sitting still, shot discipline.
Cost and logistics: Moderate. Season windows vary by province.

Big game
-
Whitetail deer
Style: Tree stand or ground sit, still-hunt in the wind, read sign, play the wind all day.
Teaches: Scent control basics, patterning, patience, shot placement.
Cost and logistics: Moderate. More time scouting, more planning for recovery. -
Moose
Style: Calling during the rut, glassing big country, often a team effort.
Teaches: Trip planning, navigation, teamwork, heavy pack outs.
Cost and logistics: High. Draws or limited tags in many places, serious logistics.
Rule of thumb: start where the access and learning curve are kind. Grow from there.
How to choose your first lane
-
Access first. List places you can actually hunt within an hour or two: public land, ZECs, wildlife reserves, farm permission. If access favours grouse, start with grouse.
-
Time budget. If you have half days, small game is your friend. If you can invest full weekends, a whitetail plan can work.
-
Real cost. Price out the minimum safe kit for each option. You don’t need top-end gear. You need reliable, legal, and safe.
-
Skills you want to build. Want woodsmanship and shot windows at short range? Small game. Want to learn wind and patience from a stand? Whitetail.
-
What excites you. If a certain animal or style keeps you up at night, that’s probably your lane.
The commitment that pays off
Once you pick, commit for a full season. Hunt the same few places in different conditions. Take notes after each outing. Track wind, cover, sign, sightings, and what you learned. By the end of the season you’ll know those spots like a local. That knowledge transfers when you add your second species next year.
If you don’t know where to start, again, grouse is a great entry point. If a different hunt is already calling you, listen to it and focus. Either way, pick one and go all in.

STEP 3: Build a simple plan and run it
1) Paperwork in one place
Get the admin out of the way: licenses, season dates, zones, bag limits, legal methods. Save the PDFs, screenshots, and phone numbers in one folder on your phone. Pin the map of your zone. Set a calendar reminder for the season opener and the last day.
2) Map three real spots within an hour
Choose three places you can reach fast: one primary, two backups. Mark parking that doesn’t block a gate. Sketch a short loop for each spot that you can walk in under two hours. If permission is needed, ask politely and write down the owner’s name and conditions.
3) Scout smart for big game
Split scouting into two parts so you don’t burn out a spot before you hunt it.
-
E-scout first. On satellite and topo, mark bedding, food, water, and the travel lines between them. Look for funnels, saddles, inside corners of fields, creek crossings, and edges where two covers meet.
-
Whitetail: mast trees, cut corn or hay, leeward ridge beds, narrow pinch points.
-
Moose: bog edges, alder flats, beaver ponds, calling vantage with good wind.
-
Plan wind and access. For each spot, pick an entry and exit for the common winds. Avoid walking through likely bedding. Note morning and evening thermals on hills and near water.
-
Low-impact boots-on-ground. Go at midday, move slow, and log only fresh sign: tracks, droppings, rubs, scrapes, beds. Take photos and waypoints instead of wandering. If legal, hang one trail camera per spot and get in and out quickly.
-
Observation sits. Before committing to a hunt, do a one-hour watch from the edge to confirm movement and wind. Seeing one deer, or one moose track, in the right place is better than walking the whole property.
-
Set a no-go buffer. Draw a circle around core bedding and don’t enter it until you’re hunting with the right wind. Scouting should make the first sit your best sit, not worse.
4) Schedule practice before the season
Book two range sessions. Pattern your shotgun or zero your rifle. Shoot a box of clays. Practice safe loading and unloading until it feels automatic. Pick one ready position and one way to carry in the woods and stick with it.
5) Pack a small, safe kit
Keep it light: weather layers, waterproof boots, blaze orange, license card, knife, a few game bags, small first-aid kit, headlamp, water, snacks. Phone charged. Offline maps downloaded. If alone, text your plan to someone and share your location.
6) Pick a day and a window
Don’t wait for the perfect forecast. Choose a morning or an evening and commit. Check wind, entry, exit, and where your safe shot windows will be. Plan to move slowly and to sit for ten minutes at least twice. Silence and patience are skills, not moods.
7) Have a field care plan
If you harvest, know what to do next: tagging rules, a simple way to cool the meat, a garbage bag for waste, a cooler in the car if it’s warm. If you do not harvest, still walk to the spot of the sighting and take a photo of the cover for your notes.
8) Do an after-action review
Back home, write three lines: what worked, what failed, what you’ll try next time. Add wind, time, cover, sign, and any people you met. Keep it short, but do it every time. This is how a beginner becomes competent.
What this plan solves
It kills the noise. It keeps you from trying five new things on every outing. It gives you a way to measure progress that isn’t just a filled tag. Most of all, it gets you in the woods often, where all the real lessons live.
Final word
Step 1 gives you a community and a compass. Step 2 gives you a lane and a target. Step 3 gets you moving. Start with one page and one loop you can walk this week. You’ll make mistakes. That’s fine. Learn, adjust, and go again. Confidence comes from reps, not gear lists.